
UPC Barcode, Category & Inventory Tracking Options
Pick one of the three options below:
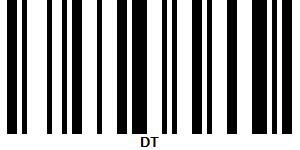
Option 1: Vendor Code Only
Option 1:
Vendor Code Only
The cashier scans your tag and Square automatically recognizes your vendor code. The cashier manually inputs the price on your tag and assigns a category.
Step 1
Create and use one barcode with the UPC code as your vendor code.
See below on how to create a barcode.
Step 2
Print your barcode and add to your current tags.
Questions?
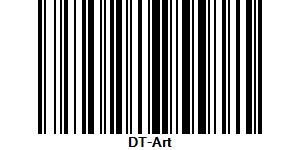
Option 2: Vendor Code + Category
Step 1
Create and use a barcode for each category you sell. Make the UPC code your Vendor Code - Category.
See below on how to create a barcode.

Step 2
Print your barcode and add to your current tags.
Questions?
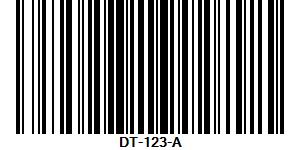
Option 3: Vendor Code + Category + Item
Step 1
Create and use a barcode for each item you sell. Make the UPC code your item number. You can use Letters, Numbers and dashes.
See below on how to create a barcode.
Step 2
Save/download the barcode to your computer
Step 3
Using a label maker (Niimbot, Dymo printer) create a price label and add your barcode to it.

Step 4
Print your label and apply to your item.
Step 5
Double check that the barcode UPC code matches the SKU in the inventory spreadsheet!
Inventory Spreadsheet
In order to add BULK items into Square, we must manually import using a spreadsheet. Therefore, we need you to use our Barcode Template below.
Step 1
Download the Barcode Template Spreadsheet (CSV)
Step 2
Search your computer for the file you just downloaded (Windows > Downloads folder)
Step 3
Open the file using Microsoft Excel, Google Sheets, etc.
Step 4
Add your items to the spreadsheet like this:
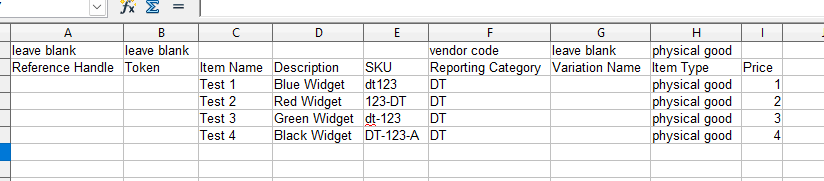
A - Leave blank
B - Leave blank
C - Add the item name
D - Add the item description
E - SKU - add your tracking number
(numbers, letters and dashes allowed)
F - Reporting Category - Add your vendor code
G - Variation Name - leave blank
H - Item Type - add physical good
I - Price - Add price
(numbers and decimals are allowed)
(Do not use a $ please)
Step 5
Save the file as a .csv and email to [email protected]
We will schedule in a time to review and import into our system.
Please do not start using barcodes until we test and give you the okay to go live.
Questions?
How to create a UPC barcode
Step 1
Google "Free Barcode Generator"
Example: https://www.cognex.com/resources/interactive-tools/free-barcode-generator
Step 2
Use the barcode generator to create your barcode.
Barcode type: Code-128
Add your vendor code, category and/or item identifier.
Step 3
Save/download the barcode to your computer
Step 4
Using a label maker (Niimbot, Dymo printer) create a label and add your barcode to it. If you're doing option 3 above, add your price to the label like this:
Step 5
Print your label and apply to your item.
Step 5
Test at the register to make sure it works correctly.